DotNetNuke Chat Integration
My Live Chat Plugin for DotNetNuke allows you add live chat solution to your DNN CMS
within few minutes. My LiveChat is a free, fast, high performance and most user-friendly
live chat solution. It allows you to live chat with website visitors, monitor site
traffic, and analyze visitors' web activities, including their search engine and
keyword usage.
This tutorial will help you install LiveChat solution on your DotNetNuke 8.x. Before you proceed you need to have a MyLiveChat account. If you don't have one,
please sign up for a free LiveChat account.
Start Now
Step 1. Copy MyLiveChat Code
Login mylivechat web console, click
Deployment menu on the left. Choose Chat Button tab and copy mylivechat
code.
Step 2. Add New Module for MyLiveChat
Log into your DotNetNuke with your admin account. Once you're in, on the top menu, select "modules" and then "add new module",
drag "HTML" Module to where you want to display the module.
Step 3. Edit title for New Module on page
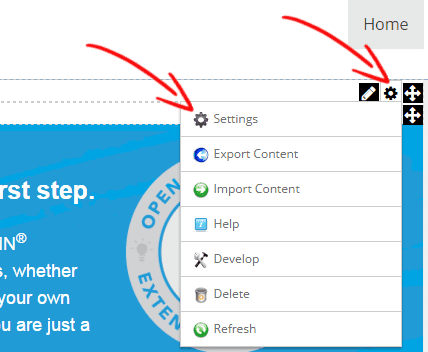
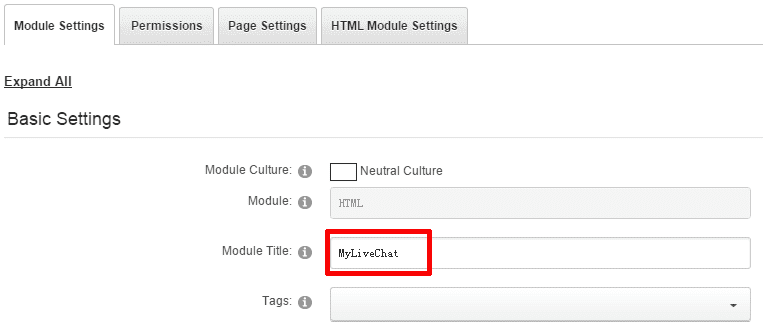
Look for the new module in your page, roll over the "Manage" icon link and click "Settings", input Module Title and save.
Step 4. Edit MyLiveChat script code to module's content
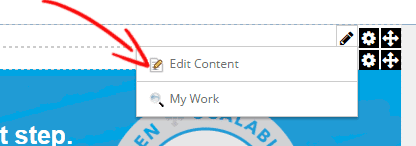
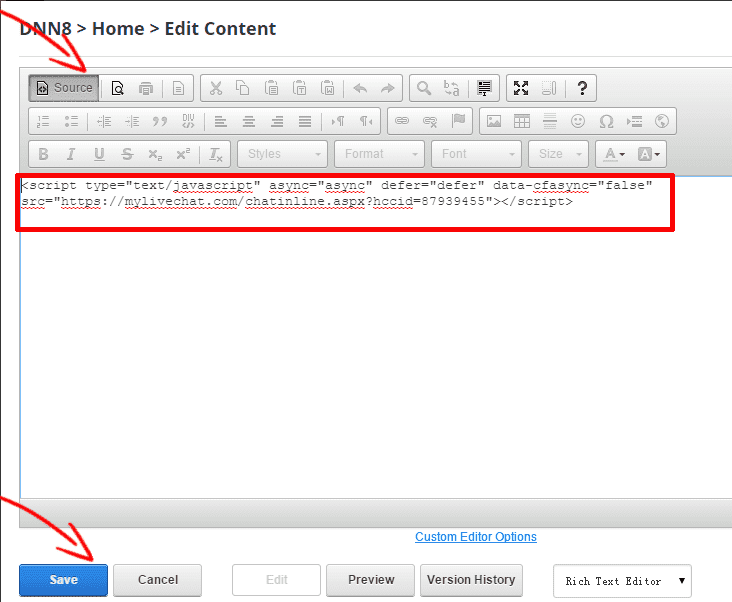
Look for the new module in your page, roll over the "Edit" icon link and click "Edit Content", click on the "Source" button of the editor and paste mylivechat code and save.
What's next?
To start chatting with your customers, install desktop agent console or use web agent console.
Any questions?
We're always willing to help you. If you have any questions, please contact us using
LiveChat button on top of this page or visit the Support page.